The latest version of the Soundpaint User Manual can be found Here!
Frequently Asked Questions
Find Answers To All Your Questions
SOUNDPAINT USER MANUAL
Soundpaint/8Dio Crossgrade libraries
This list is ever-expanding as our Soundpaint catalogue continues to grow:
| Category | 8Dio | Soundpaint |
| Alt. ensemble | ||
|
Acoustic Grand Ensemble (AGE) Vol. 1 Acoustic Grand Ensemble (AGE) Vol. 2 Acoustic Grand Ensemble (AGE) Vol. 1 Acoustic Grand Ensemble (AGE) Vol. 2 Acoustic Grand Ensemble (AGE) Vol. 2 Acoustic Grand Ensemble (AGE) Vol. 1 Acoustic Grand Ensemble (AGE) Vol. 1 Acoustic Grand Ensemble (AGE) Vol. 2 Acoustic Grand Ensemble (AGE) Vol. 1 |
||
| Ambience | ||
| Supercluster | Supercluster | |
| Bass | ||
|
Basstard Bazantar |
||
| Brass | ||
|
Fire Trumpet (Bible of Salsa Vol. 3) Fire Trombone (Bible of Salsa Vol. 3) Fire Sax (Bible of Salsa Vol. 3) CAGE Brass Century Solo Brass Trumpet Century Solo Brass Flugelhorn Majestica |
||
| Bundles | ||
| Symphonic Shadows | Symphonic Shadows Bundle | |
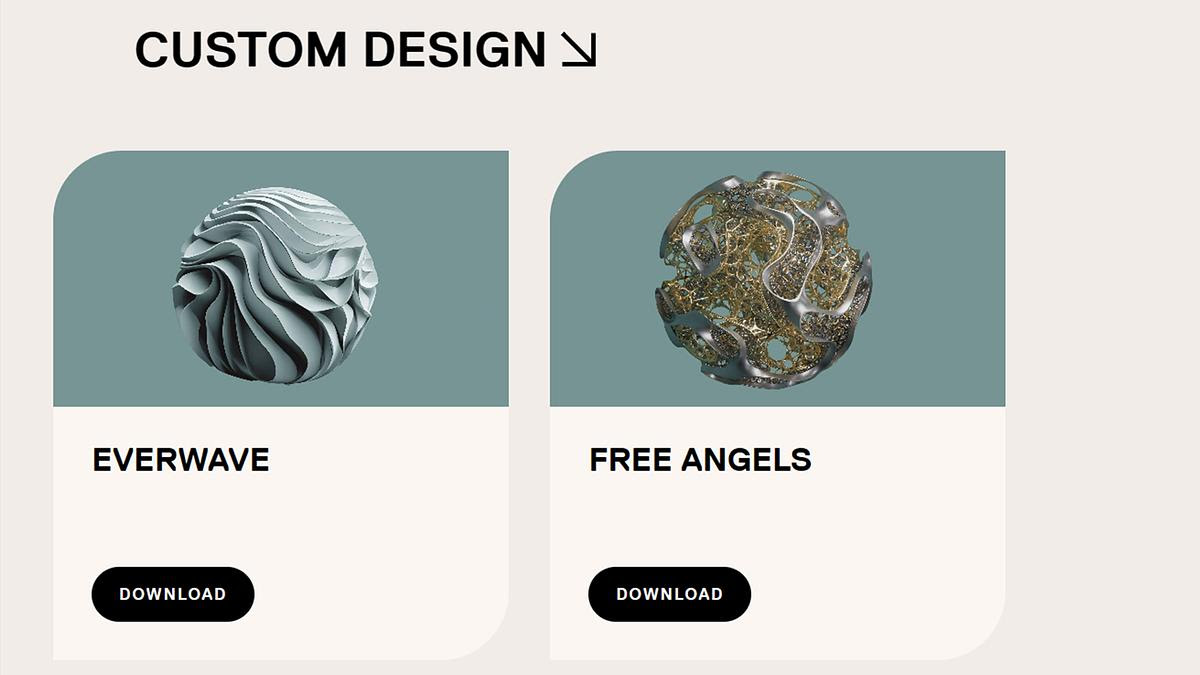
| Custom Design | ||
| EverWave | EverWave | |
| Choirs | ||
| Requiem Pro | Requiem Nova | |
| Studio Sopranos | Studio Sopranos | |
| Drums | ||
| Blackbird Drums | Blackbird | |
| Epic Ensemble | ||
|
Epic Dhol Ensemble Epic Frame Drum Ensemble Epic Taiko Ensemble Epic Toms Ensemble Extreme Ensembles 10 Analog Synths Extreme Ensembles 10 Basses Extreme Ensembles 10 Electric Guitars Majestica (8W) |
Extreme Ensembles 10 Analog Synths |
|
| Guitars | ||
|
Emotional Guitars Multi-Sampled Emotional Guitars Pads Instant Guitar Series Acoustic Guitar Instant Guitar Series 12 String Guitar Instant Guitar Series Electric Guitar Instant Guitar Series Steel String Instant Guitar Series Dobro |
||
| Hybrid | ||
|
Hybrid Tools Volume 1 Hybrid Tools Volume 2 Hybrid Tools Volume 3 Hybrid Tools Volume 4 Rhythmic Auras I Hybrid Tools Terminus |
||
| Keyboards | ||
|
Studio Vintage Hammond Organ Studio Vintage Series Suitcase 54 Piano |
||
| Percussion, Tonal | ||
|
5 Studio Exotic Percussions Glass Marimba Studio Steel Drum Wrenchenspiel |
||
| Piano | ||
|
1901 Studio Upright Piano 1969 Legacy Grand Piano 1971 Estonia Grand Piano 1985 Passionate Piano 1990 Prepared Studio Grand Piano 1990 Studio Grand Piano |
||
| Strings | ||
|
Adagio, Anthology, Agitato, Adagietto Adagio, Anthology, Agitato, Adagietto Adagio, Anthology, Agitato, Adagietto CAGE Strings Century Harps Majestica |
||
| Voices | ||
|
Forgotten Voices Barbary Forgotten Voices Cait Forgotten Voices Terrie Forgotten Voices Francesca |
||
| Woodwinds | ||
|
Claire Clarinet Studio Solo Sax (Sax Trio) Claire Oboe Studio Solo Sax (Sax Trio) Claire Alto Flute Claire English Horn Studio Soprano Sax Claire Piccolo Claire Flute Claire Bassoon CAGE Woodwinds Majestica |
||
| World | ||
|
Harmonium Santur 3 Duduks |
||
If you own any of these libraries on 8Dio and would like to crossgrade to the Soundpaint versions, you should receive a crossgrade discount email automatically if you are signed up for the 8Dio Email Newsletter. Note that you will not receive these crossgrade emails if you are not signed up for our mailing list, so if you do not receive these emails or if the discount no longer works, please email us at support@soundpaint.com.
Why is Soundpaint Free?
We wanted to make something that was available to everyone. We do not believe in limiting this new technology behind a pay wall and wanted to be able to share it with everyone we can. While additional libraries for Soundpaint are not free, it does come with a free copy of the 1928 piano. We do also have several other free libraries available here.
Will the All Bundle give me future releases?
The All Bundle will only ever include all currently available products, and will not offer you future releases.
Will Soundpaint work with my OS?
Soundpaint is compatible with both Mac and PC, but will not work on older operating systems that are no longer officially supported.
Soundpaint currently requires Mac 10.14 or later, or Windows 10 or later.
What are the minimum system requirements for Soundpaint?
Soundpaint and its Soundpaint Downloader Application required either Mac OS 10.14 or later, or Windows 10 or later to be run on your device.
We do also recommend having at least 8GB of RAM, and an Intel I7-6700 or equivalent CPU
The disk space for each library can be found on each page, below the "add to cart" button.
Does it cost anything to use Soundpaint?
No! The Soundpaint engine is free. No one-time payment. No subscription. Free. You only need to purchase the libraries and we have a number of free libraries available if you want to test the engine first!
The library download button on the website does not work. How do I download libraries from the site?
The download buttons on the site link directly to the Soundpaint app and its downloader, so you will want to make sure you have both apps installed before selecting the library download option on the Soundpaint website. If these apps are not installed, the download buttons on the site will not work. You can download Soundpaint from the Engine tab of your account page.
A full setup tutorial can be found here:
https://www.youtube.com/watch?v=W9XENO5LQ_g
If you need any help downloading your libraries, please reach out to us through our live chat or at support@soundpaint.com.
Can I customize the layout of the racks?
You can customize the order of each rack. Simply drag and drop them to your desired order. Effects are processed from left to right.

Does Soundpaint come with a VST version?
Yes, Soundpaint includes both VST2 and VST3 plugin versions, which are compatible with most DAW's. It also includes an AU version, an AAX version and a Standalone application.
Is anything else planned to be added to Soundpaint?
We are currently developing more features, and are always adding more! We have already implemented options for legato, expanded user sample import options, tattoos, colour, and created our AAX version. Many more options are yet to come, and we plan on added as many features as we can to improve the engines functionality!
Error Occurred. Please Restart Download with Mac OS 10.13
Due to Mac updates we cannot officially support Mac OS 10.13
When downloading the libraries the download will most likely be successful until the unpacking process. The issue that Mac OS 10.13 users have had is that at the end of the Unpacking process they receive the message “Error. Please Restart Download" because the current version of the downloader is not compatible with Mac OS 10.13 and cannot unpack the downloaded files. It is unlikely that we will officially support it.
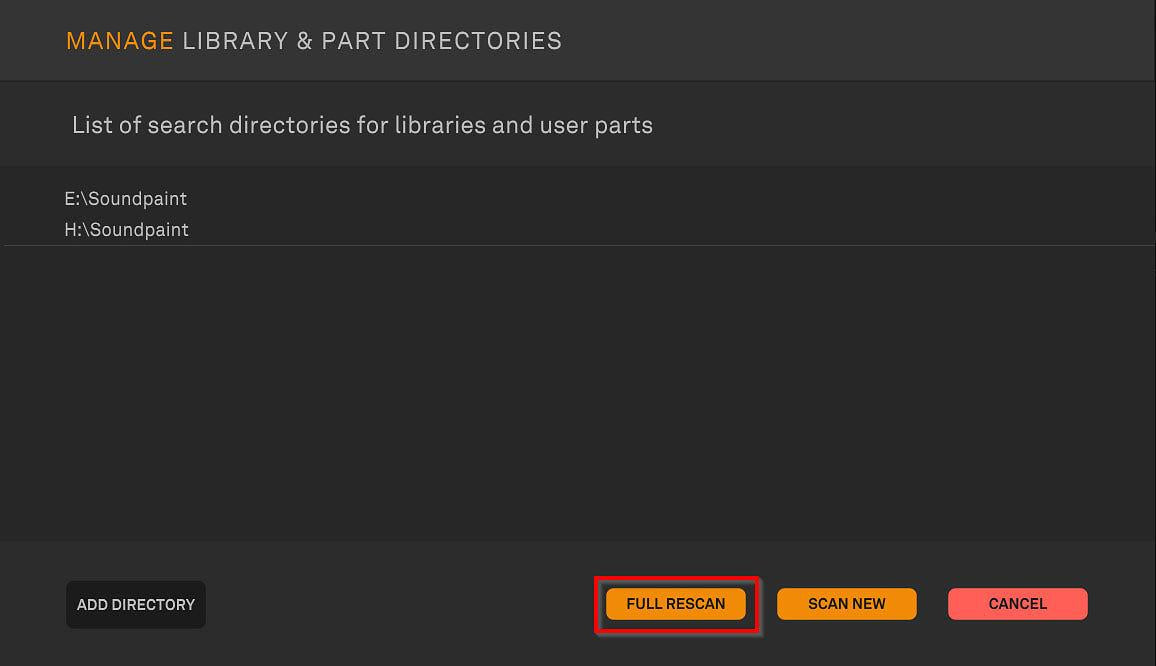
Please use the Unarchiver or Keka to unpack the downloaded zip files. You do not need to keep the zip files or unpacked folder. You only need to keep the folder that is unzipped. (Do not delete zip files before they have finished unpacking). You will need to make sure the library location is listed in the Directory list and then do a Full Rescan after the libraries have finished unpacking. Please note that sometimes this does not work. However, this is the only current solution other than updating your OS.
Do V8P members of 8dio get special purchase offers?
We will not be able to offer special offers to V8P members of 8Dio. As all of the samples in Soundpaint have been completely redesigned and reworked, everything you get for Soundpaint is almost an entirely new library.
For some libraries, we do have crossgrade discounts available for owners of the 8Dio version. You can find a list of these libraries in "Soundpaint/8Dio Crossgrade libraries" under "General FAQ"
How do I do a full rescan?
To perform a full rescan of your library directories, you can click the scan icon to the right of Soundpaint search bar in the top left.
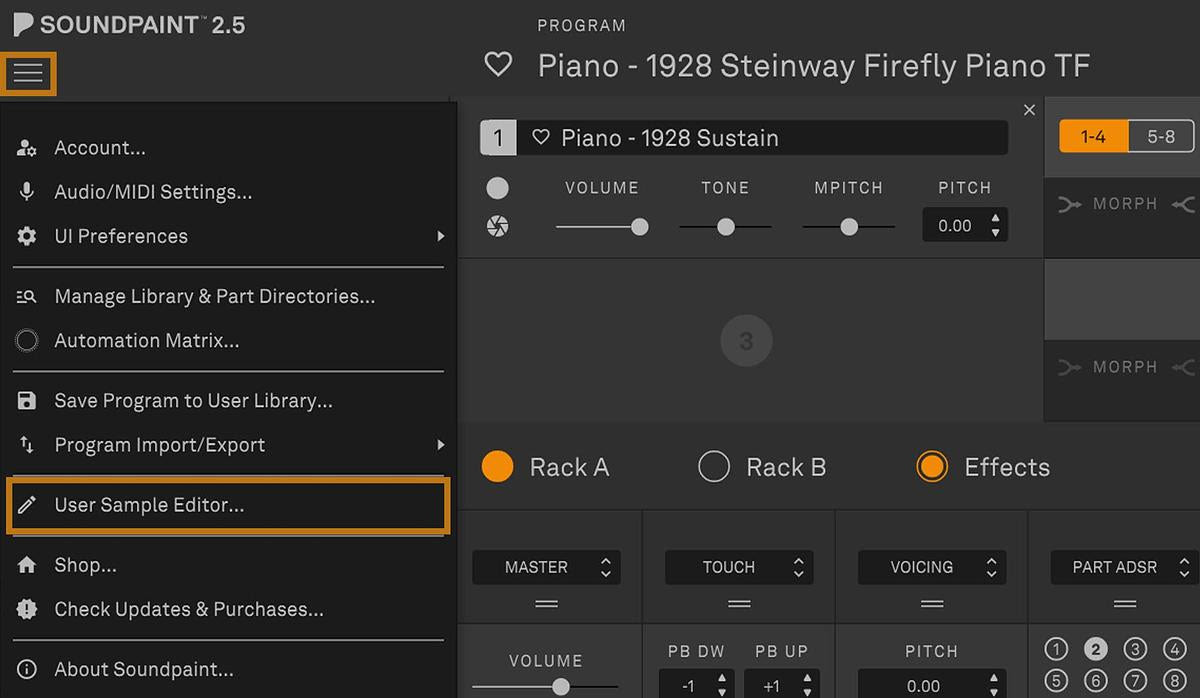
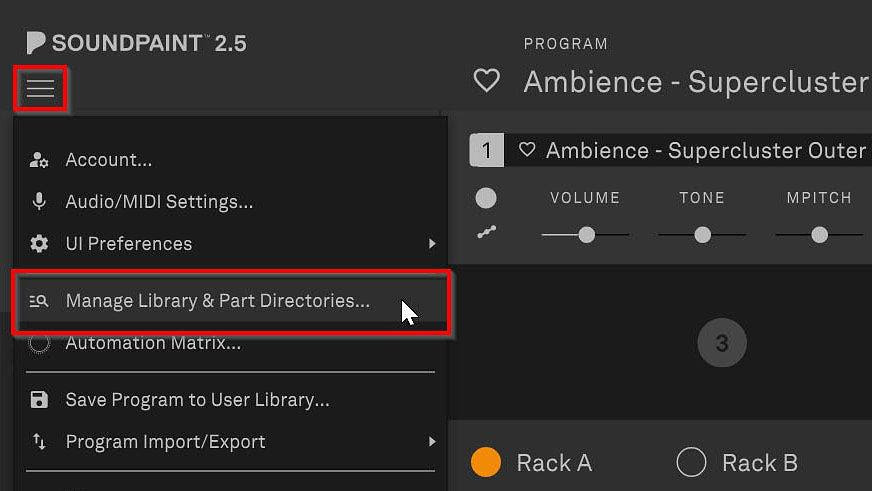
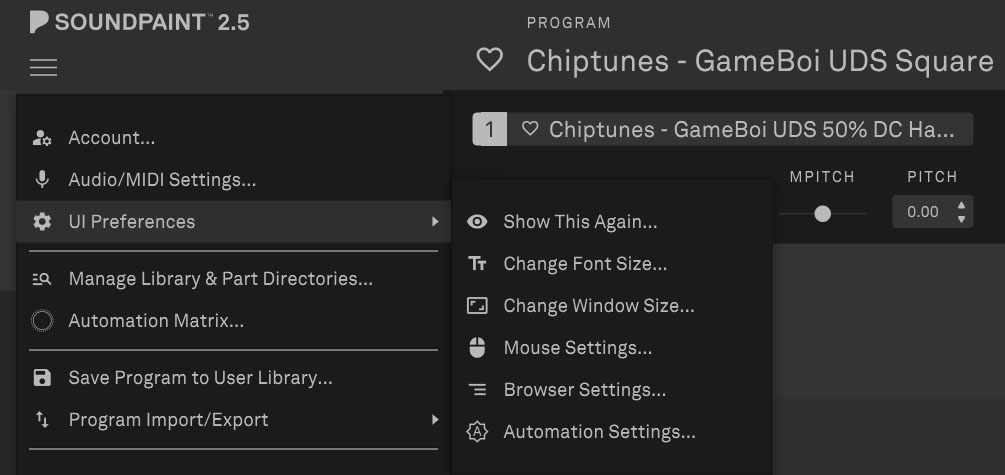
Additionally, you can do a full rescan from the soundpaint directory menu. click "Manage Library & Part Directories..."

from the Hamburger menu in the top left corner of Soundpaint.

Then, click the "full rescan" button in the bottom right corner of the window.
Soundpaint is no longer working in Logic Pro
With the latest version of Logic Pro and Soundpaint, some users have reported it is no longer functioning correctly.
This is a common issue with Logic Pro! Even after deleting AU plugins, Logic can still "remember" them due to cached plugin information. To resolve this, users will want to clear the logic plugin cache.
Here's how to fully remove all traces:
Clear Logic's AU cache:,
Quit Logic Pro completely
Go to ~/Library/Caches/AudioUnitCache/ and delete any Soundpaint-related files
Also check ~/Library/Caches/com.apple.audiounits.cache/
Reset Logic's plugin scan:,
Hold down Control + Option while launching Logic Pro
This forces Logic to rescan all plugins and rebuild its plugin database
Check these additional locations for any remaining files:,
/Library/Audio/Plug-Ins/Components/ (system-wide AU plugins)
~/Library/Audio/Plug-Ins/Components/ (user AU plugins)
/System/Library/Components/ (though unlikely for third-party)
Look for any Soundpaint or 8Dio related .component files
If it's still showing up:,
Go to Logic Pro > Preferences > Audio > General
Click "Reset" next to "Plug-in Manager"
This will completely reset Logic's knowledge of all plugins
After doing this, Logic should stop detecting the removed Soundpaint plugin. The Control + Option launch method is usually the most effective solution! Some users will need to reinstall Soundpaint afterwards.
What Soundpaint Libraries Use The New PCM Format?
With the release of Soundpaint 4.0 in March 2025, we now have libraries that are made using PCM (Pulse-Code Modulation) samples instead of RTS (Real-Time Samples).
Below is a list of all PCM libraries.
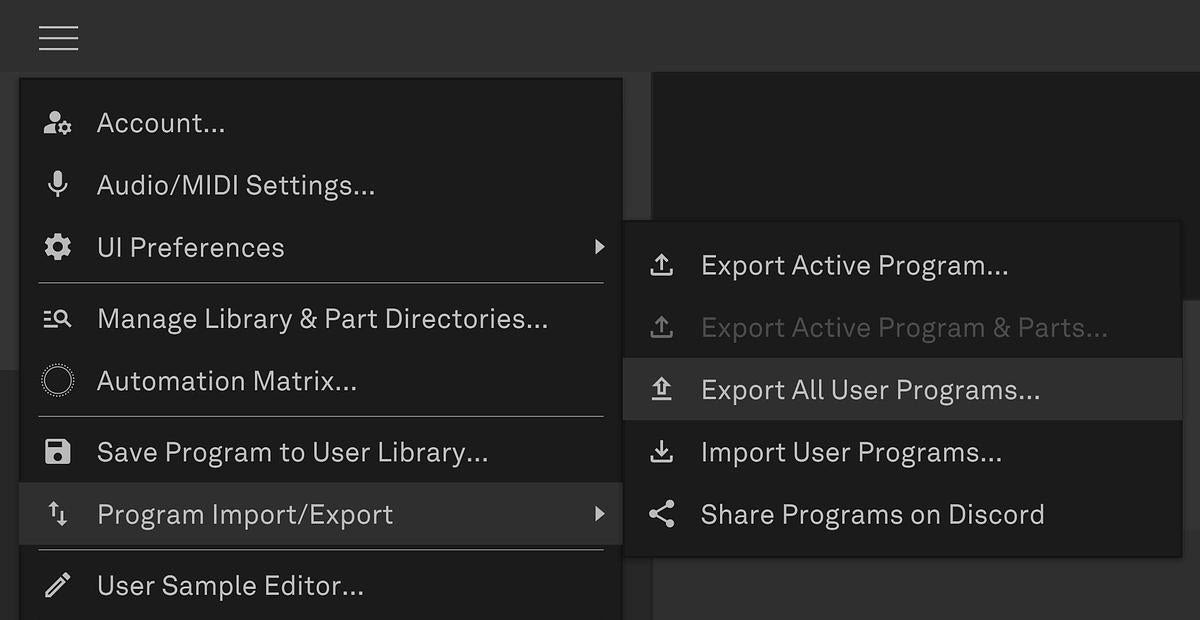
How Do I Add Tattoos To My Programs?
Tattoos are custom images you can add to your soundpaint programs to add some visual spice.
To add a Tattoo, create a transparent picture file according to your preference and then simply drag it into the Soundpaint UI for the part you would like the Tattoo to show on. Our new Soundpaint 3.0 Walkthrough provides more information and examples at the 21:33 mark.
Any Tattoo Images will need to be 1712 X 412
How can I reset my account password:
If you are having trouble logging in, or need to reset your account password for any other reason, you can do so on the login page. Underneath the fields to enter your email and password, simply click the "Password Reset" option, and you will be emailed a link you can use to make a new password.
Known Issues for OneDrive Users:
Some Windows users may experience issues with OneDrive enabled. These will not affect all OneDrive users, however if you are experiencing any of the below issues, these can be caused by having OneDrive active on your device:
- Downloaded files are corrupt
- Library downloads are automatically going into your documents or OneDrive folders
- Errors loading sound files when you load a library part or program
If you encounter any of these issues, and OneDrive is enabled on your device, please email support@soundpaint.com.
We also recommend disabling OneDrive temporarily to see if this resolves the issues on your device. Before disabling OneDrive copy the files in those special folders to another folder or external drive. We recommend using a seperate external drive if possible. Disabling OneDrive backup for a folder erases the local copies of the files., so it is important to insure you have backed up those files in another location. Copying them to a different location beforehand will ensure that you don’t need to download them again from the OneDrive cloud.
1. Right-click the OneDrive icon in the Notification area and click Settings.
2. Select the Backup tab, and click Manage Backup
3. In the Manage folder backup dialog, click on the Stop backup link for "Desktop"
4. Click Stop backup in the confirmation dialog that appears.
Is Soundpaint compatible with Mac M1 Silicon
Yes, Soundpaint and its libraries are natively compatible with the Mac M1 and M2 family of processors. Soundpaint does not need to run in Rosetta.
Adastra Ensemble/Chamber/Solo Full Sections are Empty?
Adastra Ensemble and Chamber Strings currently feature 5 sections each. These includes:
- Adastra Ensemble/Chamber Violins
- Adastra Ensemble/Chamber Violas
- Adastra Ensemble/Chamber Cellos
- Adastra Ensemble/Chamber Basses
- Adastra Ensemble/Chamber Full Sections
However, some users may experience difficulty getting the Full Sections to load within Soundpaint. The Full Sections Programs will only be available so long as you have all of the other 4 instrument sections installed on your computer.
If you do have all sections installed, and the full section programs still do not list themselves, you can solve this by following these steps:
- Close Soundpaint
- Re-open Soundpaint
- Go to the menu (the 3 horizontal bars) in the top left and select "Manage Library & Part Directories"
Once here, select "full Rescan".
This will prompt Soundpaint to rescan your Soundpaint libraries and activate the Full Sections.
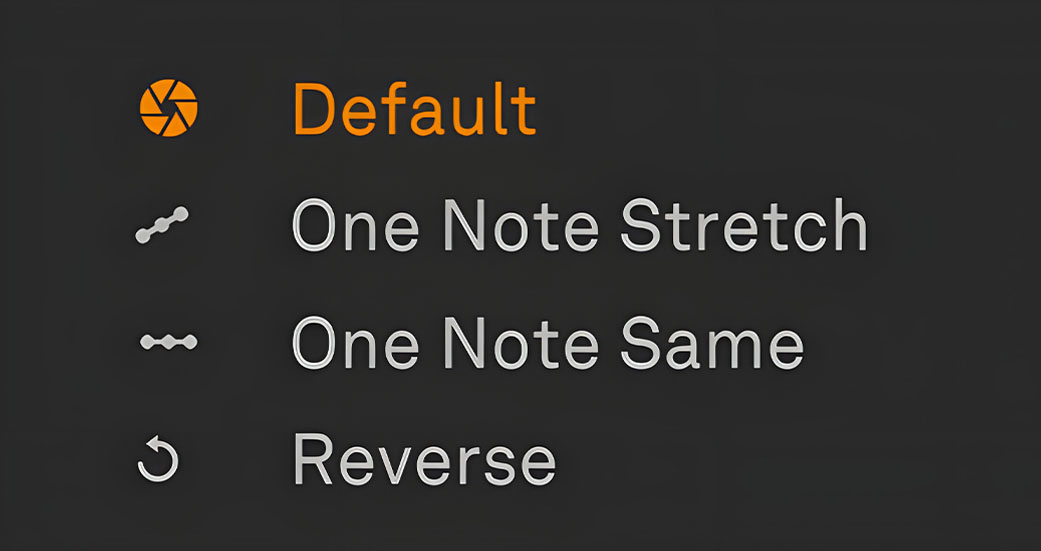
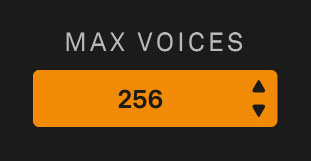
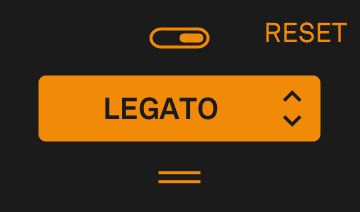
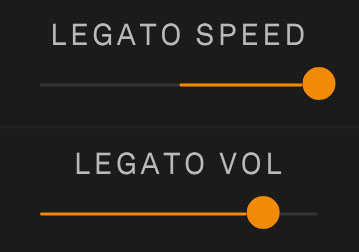
Can I Modify the Speed of Legato Transitions and Vibrato?
Certain features of samples can be modified to be faster or slower by using Soundpaints Time Rack.
To do this, load in a part or program that features legato or vibrato. Once loaded, go to either Rack A or Rack B and load in Soundpaints Time Rack. When the Time Rack is loaded, you can use the speed knob to adjust the speed of both legato transitions and vibrato on samples.

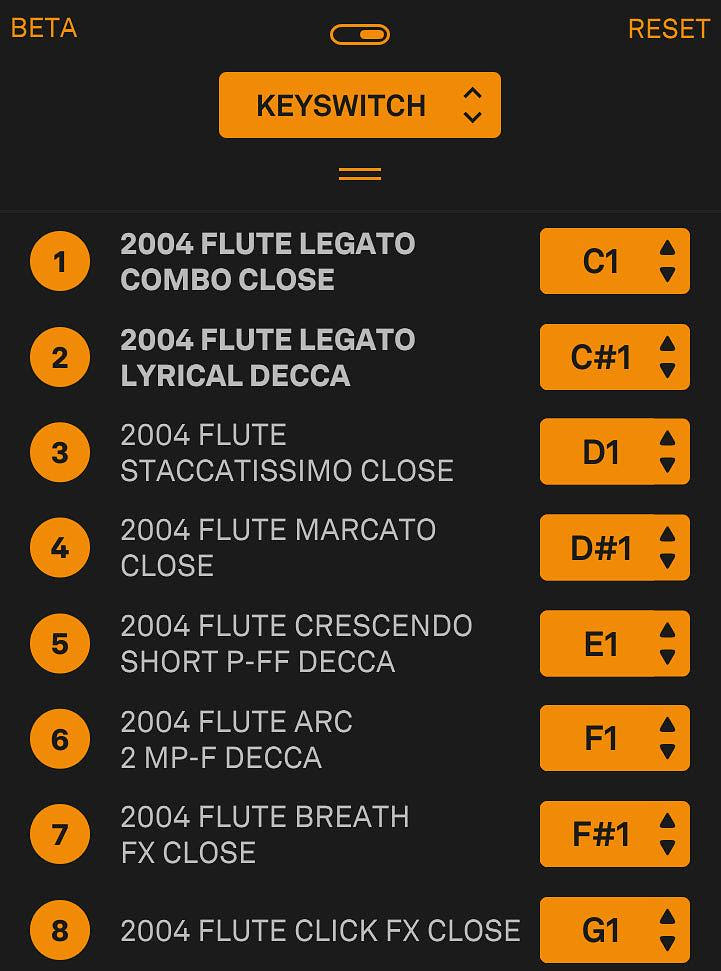
What Instruments Feature H.A.L (Hyper Acoustic Legato)?
Here is a list of all H.A.L. instruments in Soundpaint. We are releasing more all the time, so be sure to check back soon!
- Brass
- Woodwinds
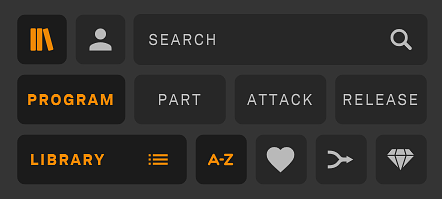
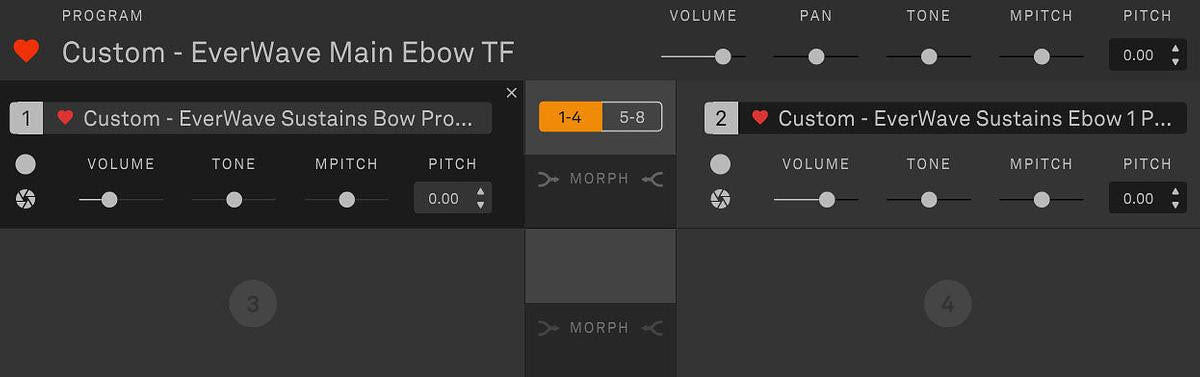
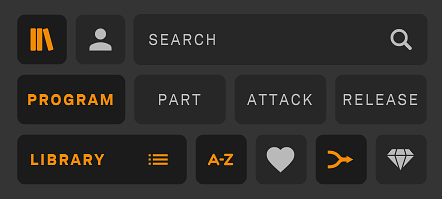
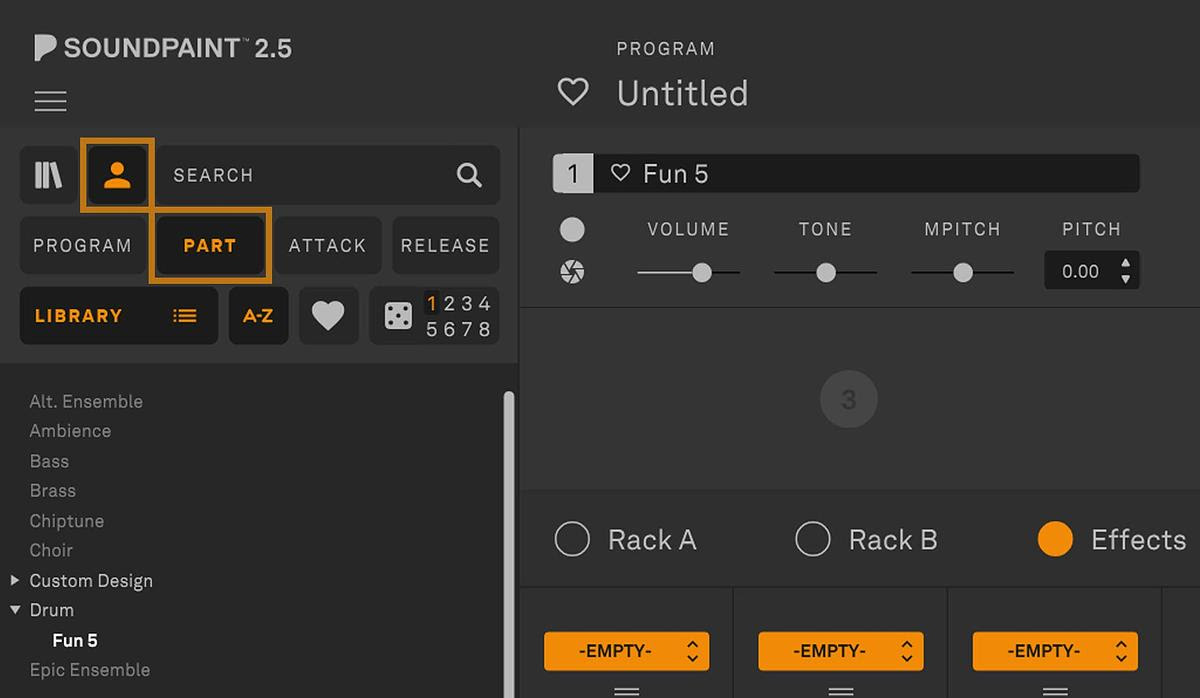
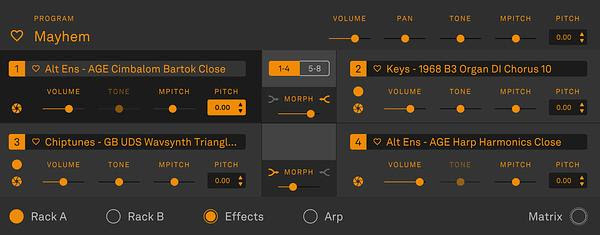
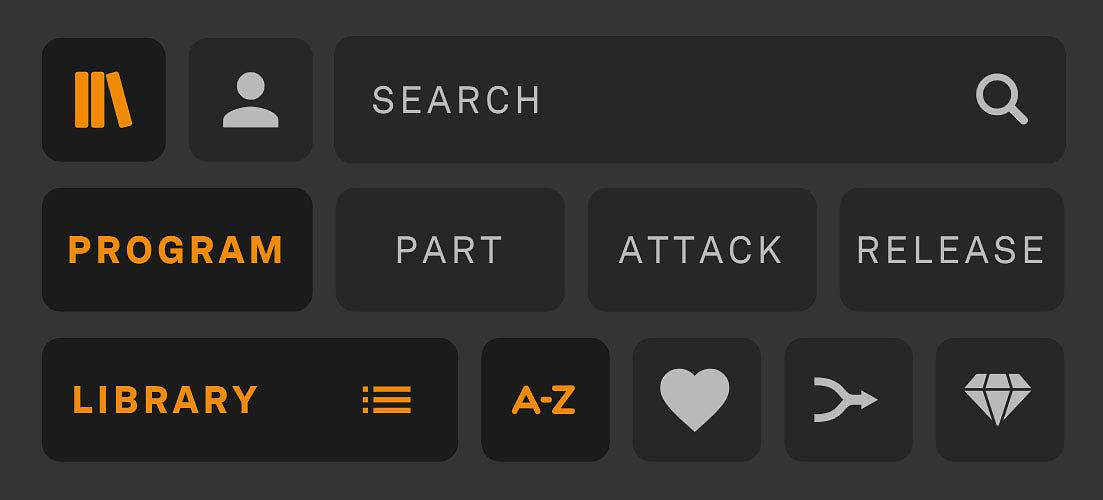
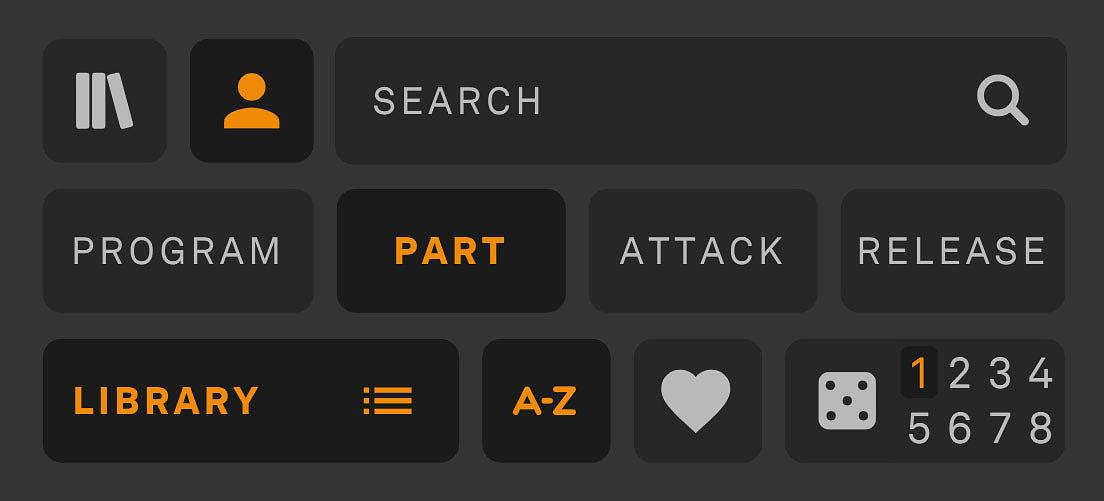
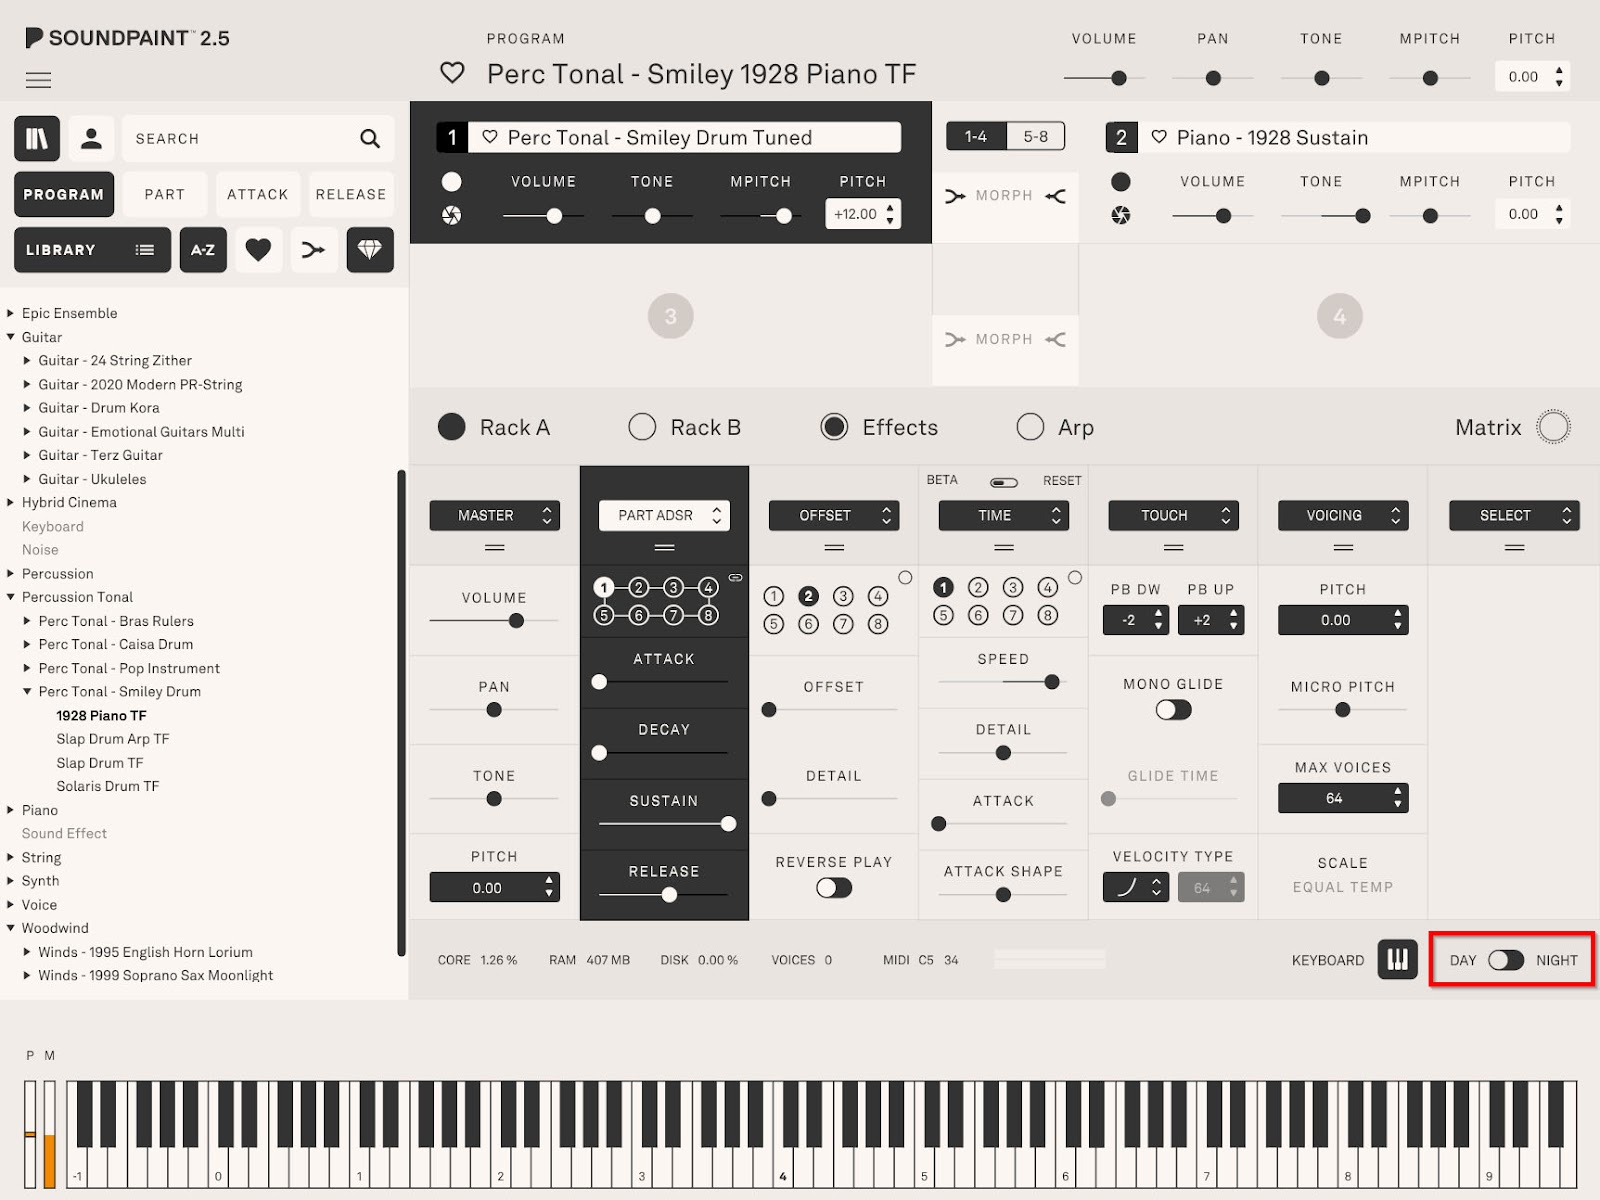
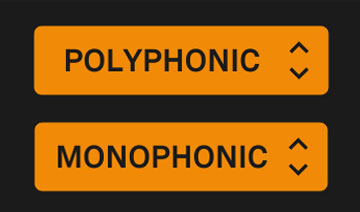
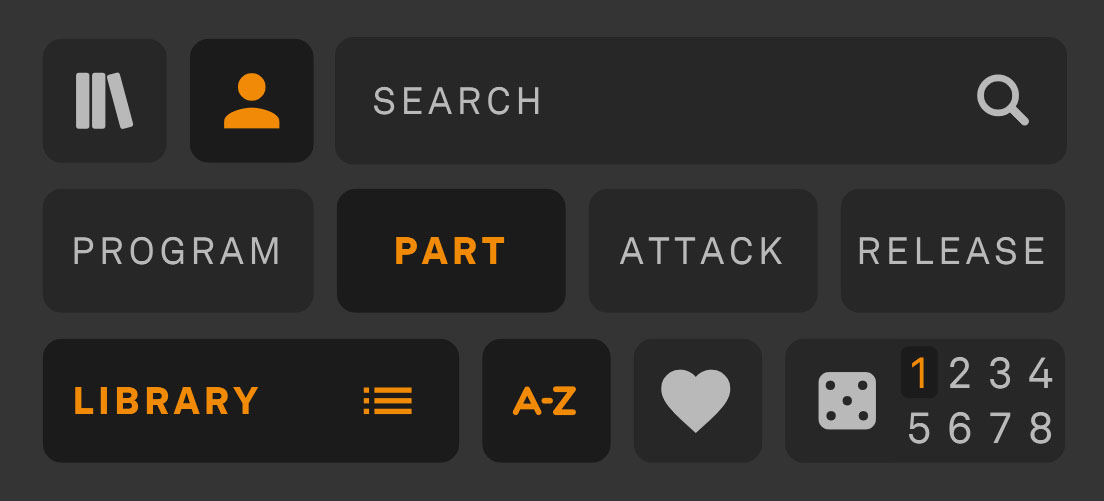
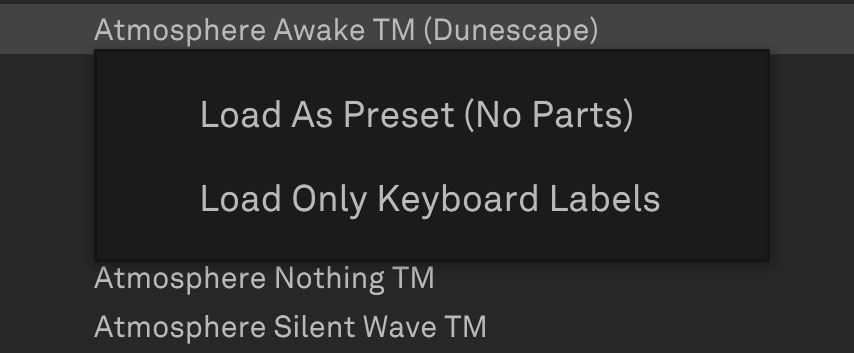
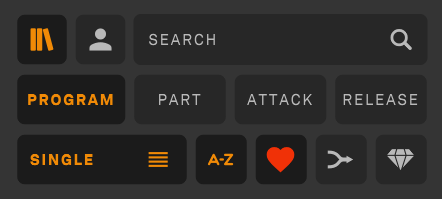
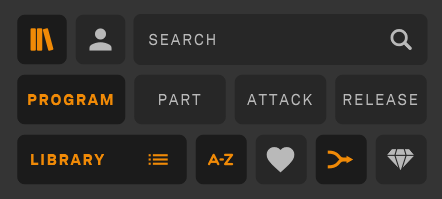
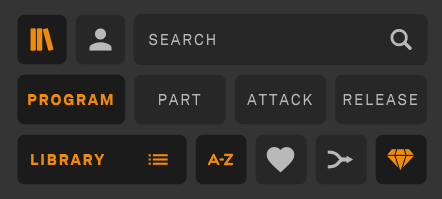
What is the Difference Between Parts and Programs?
When you download a Soundpaint instrument, you will find 2 separate lists of sounds. You can switch between these two lists with the "Programs" and "Parts" buttons near the top left corner of the interface.
Parts are the individual sounds, or the building blocks of programs. For example, a single part of an acoustic instrument will be one articulation (staccato, legato, etc.) and one microphone position (close, decca, etc.). For analog synths, a part may be a single waveform. Parts load into the 4 large boxes in the center of the Soundpaint interface. They will load over whichever box is currently highlighted, so make sure to click on an empty box if you want to add a part to the program you are using.
Programs are presets created with 1-4 parts, with the Rack, Effects, Arp, and Matrix, and any modulation settings saved as part of the Program. The name of the program will appear above the 4 part boxes.
If you want to build your own program, you can make changes or add parts to existing programs, or right-click on the program name at the top of the interface and select "New Program." This will clear all parts, effects, and other settings, allowing you to start fresh, or audition individual parts without any extra effects applied.
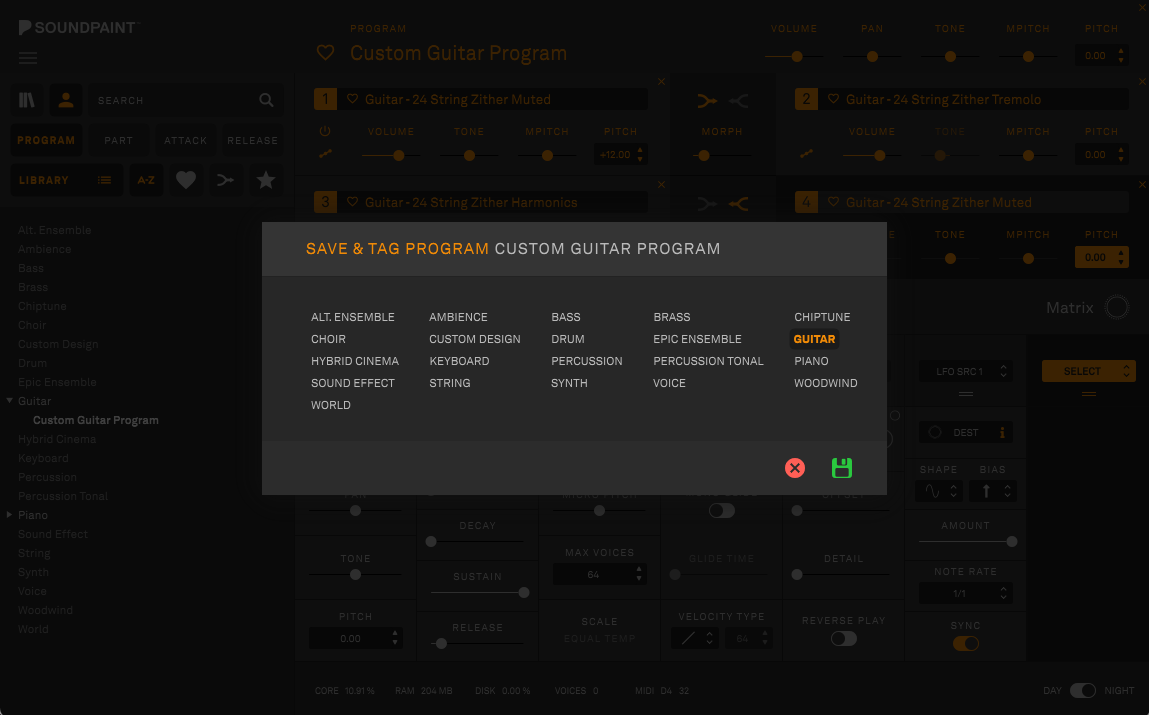
To save your own programs, select "Save program to user library" from the hamburger menu in the top left, or by right-clicking the program name at the top of the interface. You can switch between the factory and user directories with the 2 buttons above the Program & Parts buttons, in the top left corner.
You can find more information on parts and programs in the overview video below.
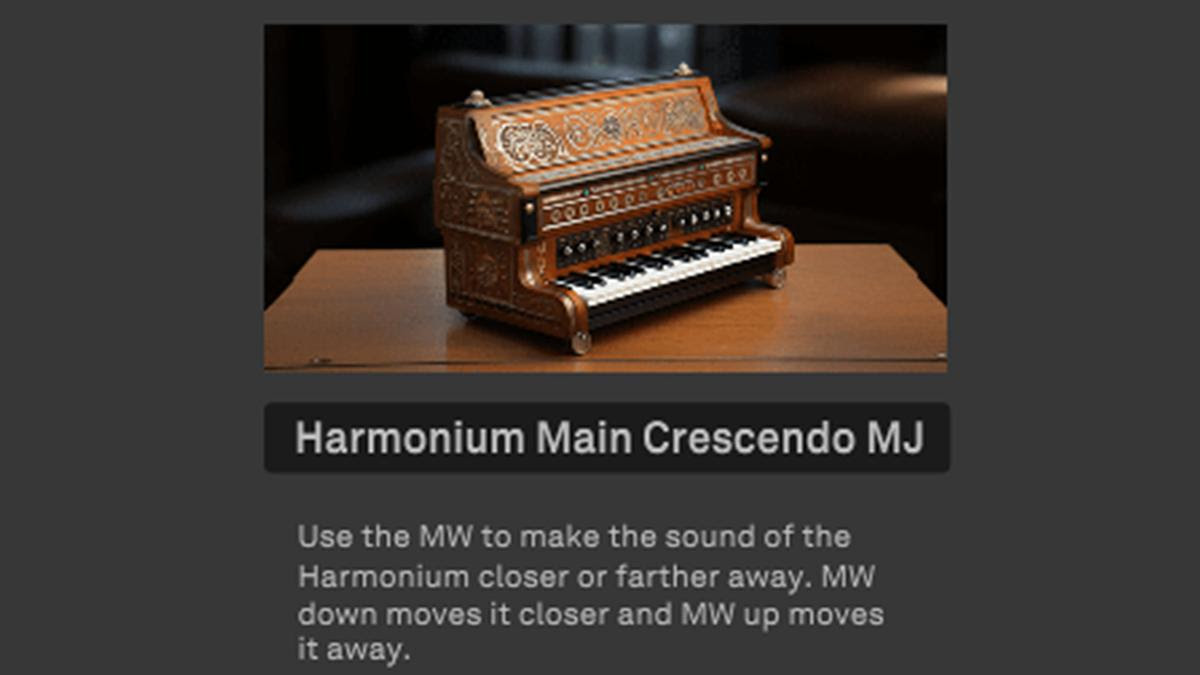
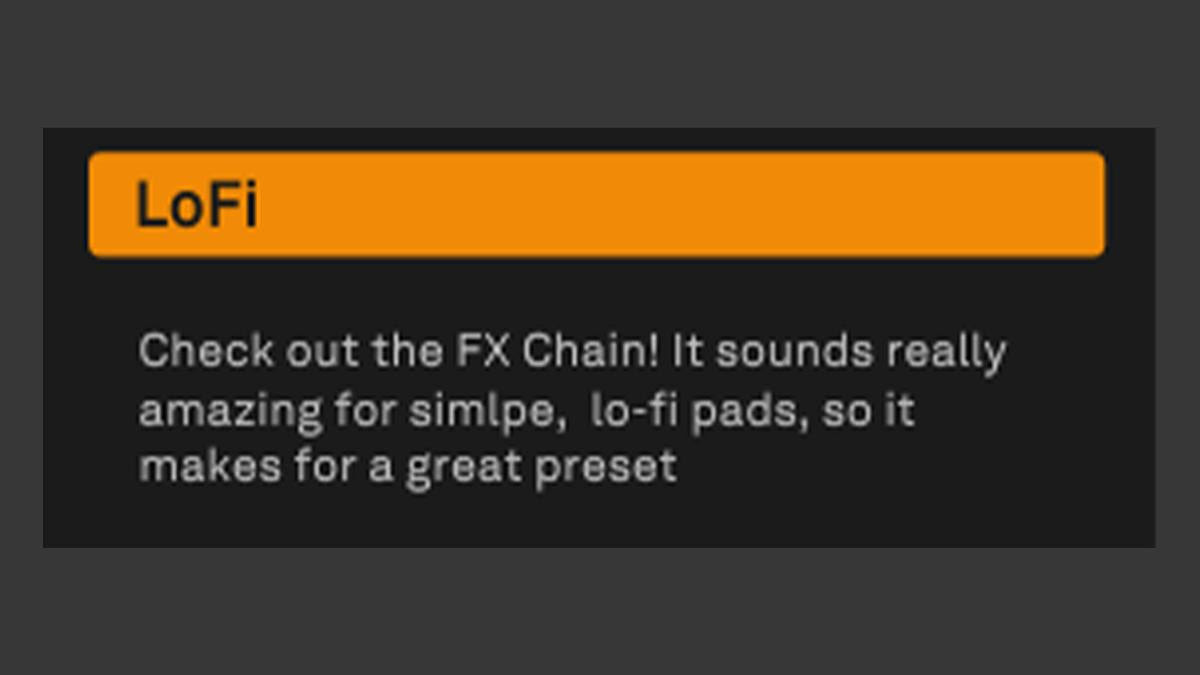
What do the letters at the end of program names mean?
The 2 letters at the end of each program name are the initials of the person who created the program. For example, a program ending with "TF" was created by Troels Folmann.
What is the difference between UDS and SDS library versions?
UDS (Ultra-Deep Sampled) versions of libraries come with a much larger sample set that provides greater sonic detail compared to the SDS (standard Deep Sampled) library versions.
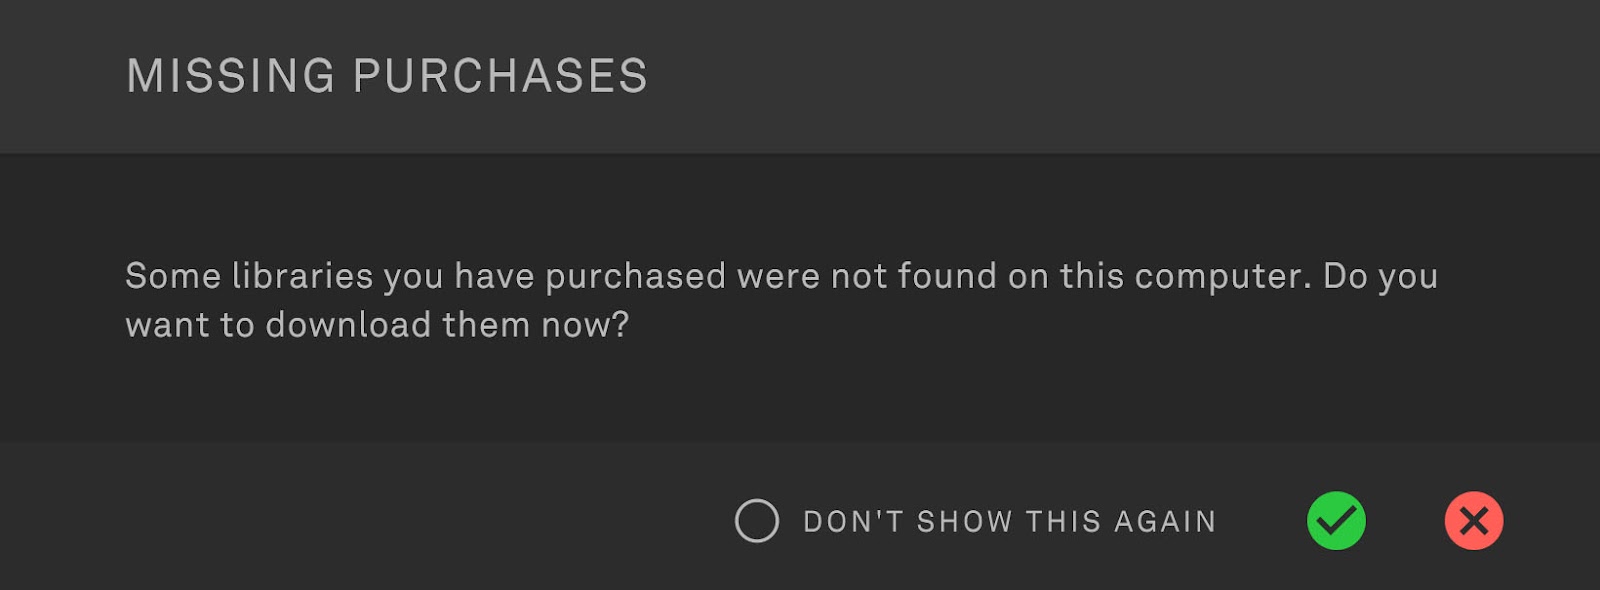
I downloaded a new library, but it’s not showing up in my library list.
After downloading a new Soundpaint library, you may need to perform a full rescan of the location the library is installed to. Newly downloaded libraries normally show up in the engine automatically, however performing a full rescan will get them to appear if the automatic feature is not working.
Once your new library has been downloaded, simply go options > Library Management > Manage Library Directories.

This will open your list of library directories. Once here, simply perform a full rescan of your current directories and Soundpaint will automatically connect your newly downloaded library.

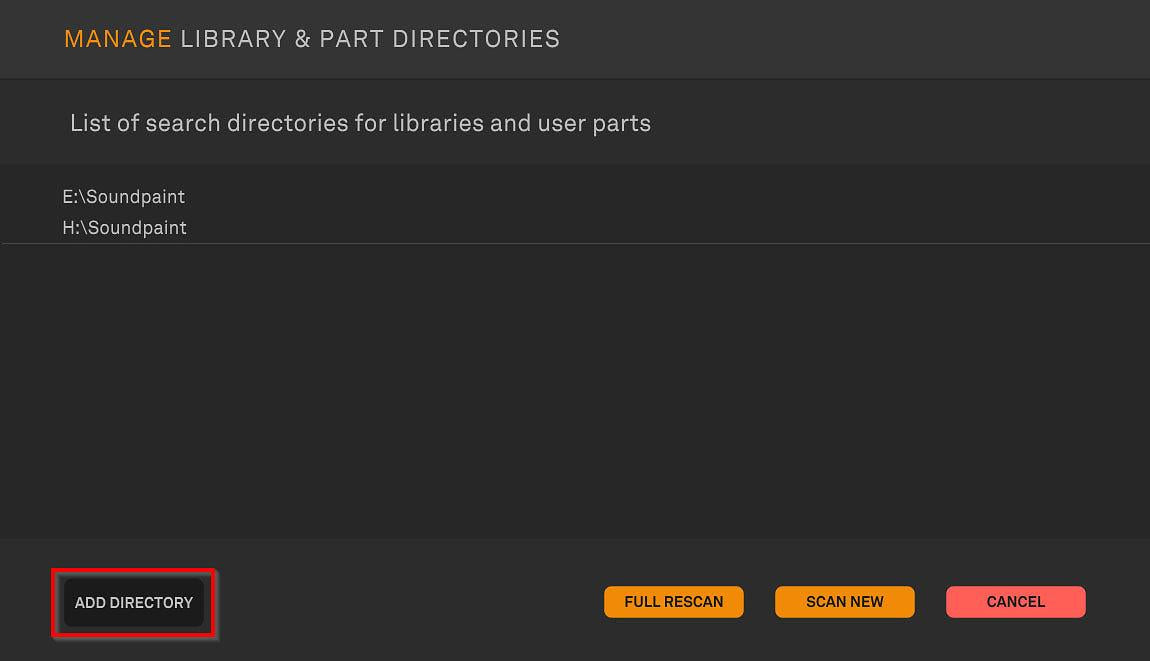
If your new library is not showing up, you may need to make a new directory which you can do using the "Add Directory" option. Once the new directory is made, perform another full rescan and Soundpaint will find your new library.

Soundpaint cannot see the libraries after they are installed
If you can't see your libraries in Soundpaint after they are installed, navigate to the options menu in the top left, click "Manage Library & Part Directories," then click "full rescan."

If the library still does not appear, add the library's location as a directory in the "Manage Library & Part Directories" window using the “Add Directory” button, then click "full rescan" again.
How do I move a Soundpaint library?
- Move the library folder (for example, "Piano - 1928 Vintage Grand Steinway") using Finder (Mac) or File Explorer (Windows) to your new desired location.

- Open Soundpaint and click "Manage Library & Part Directories..." from the Hamburger menu in the top left to open the list of directories (folders).
- Click "add directory" and select the folder where you moved the library. If you have several libraries in one folder, you can select the entire folder rather than each individual library folder. For example, if you have a folder called "Soundpaint" with 3 libraries in it, you only need to add the folder named "Soundpaint."

- Click the "Full Rescan" button.

If you have duplicates of libraries, parts, or programs, make sure the folder is deleted from the original location and click the "Full Rescan" button one more time.
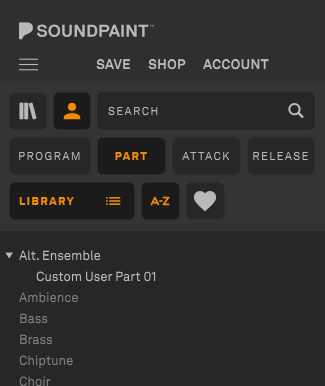
Where Do I Find My Custom Parts Within Soundpaint?
Once you have exported your custom user sample part and done a full rescan within the Soundpaint engine, your custom parts can be found by selecting the User Library icon and sorting by Part.
All of your custom parts will then be found under the appropriate category. Please note that any part that was not tagged with and instrument category will show up under "unclassified"
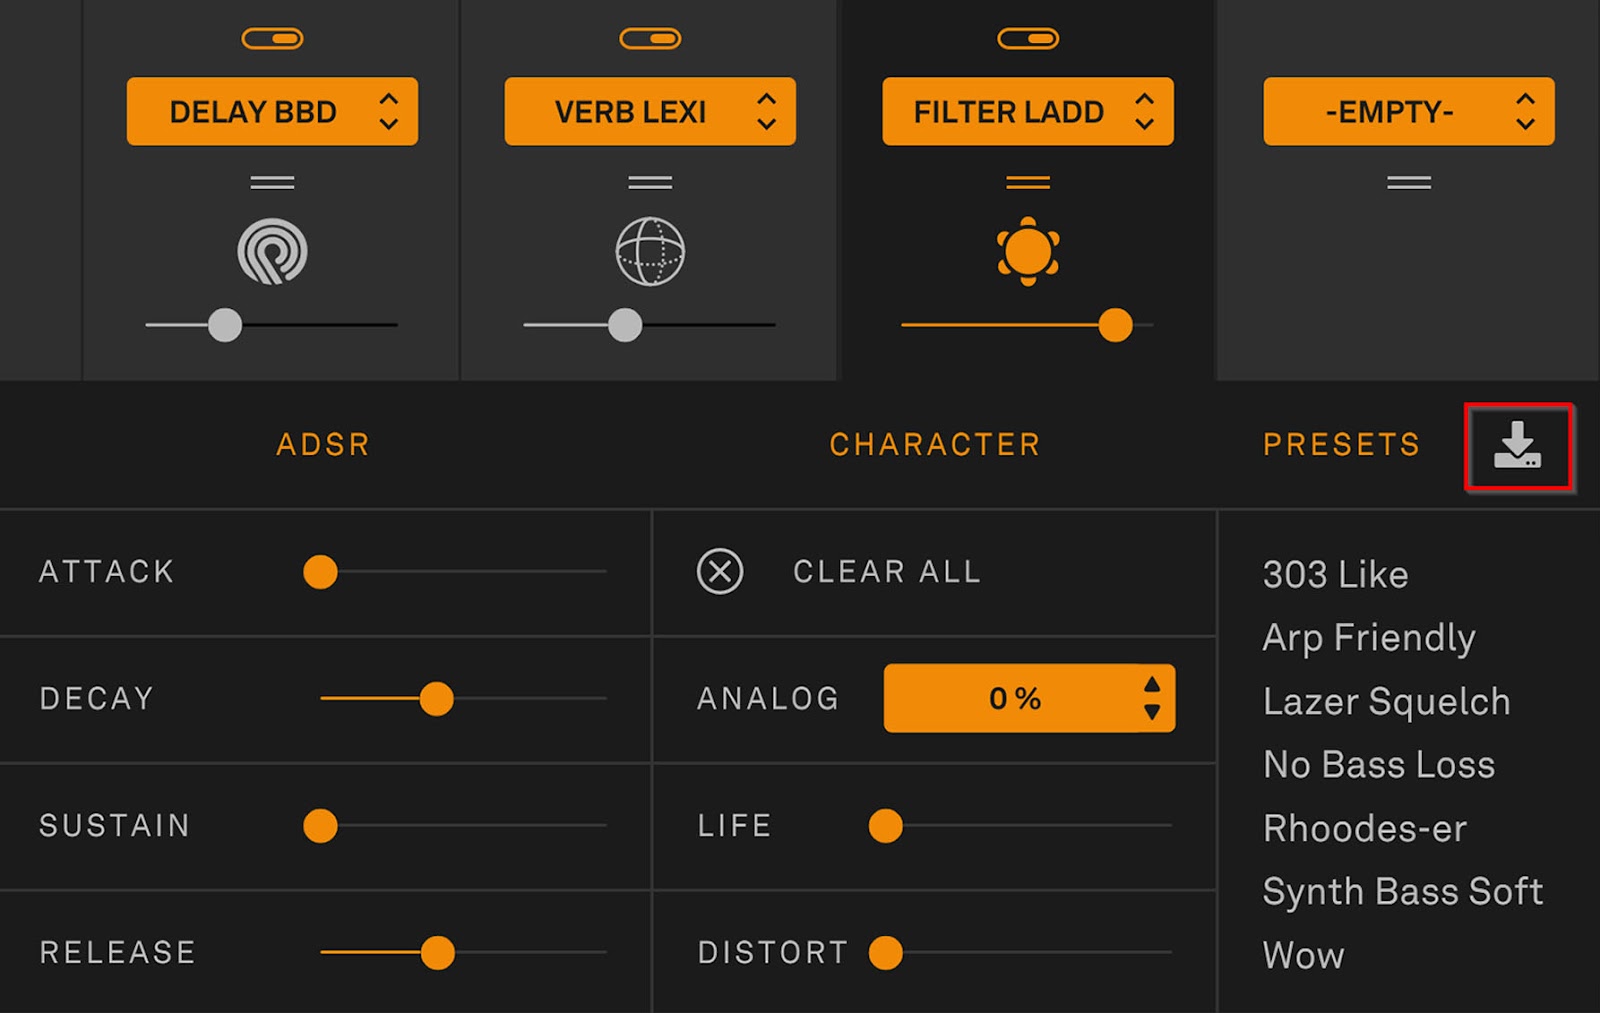
How do I save an effects preset?
To save a preset for an effect, select the effect you want to save a preset for, and click the save icon in the top right of the effect. From here you can name and save the preset. Whenever that effect rack is loaded, you can load your preset from the menu on the right-hand side.

Can I bypass effects?
Yes, you can. Instead of deleting the effect, you can bypass them by clicking the little orange button above their name in the rack.

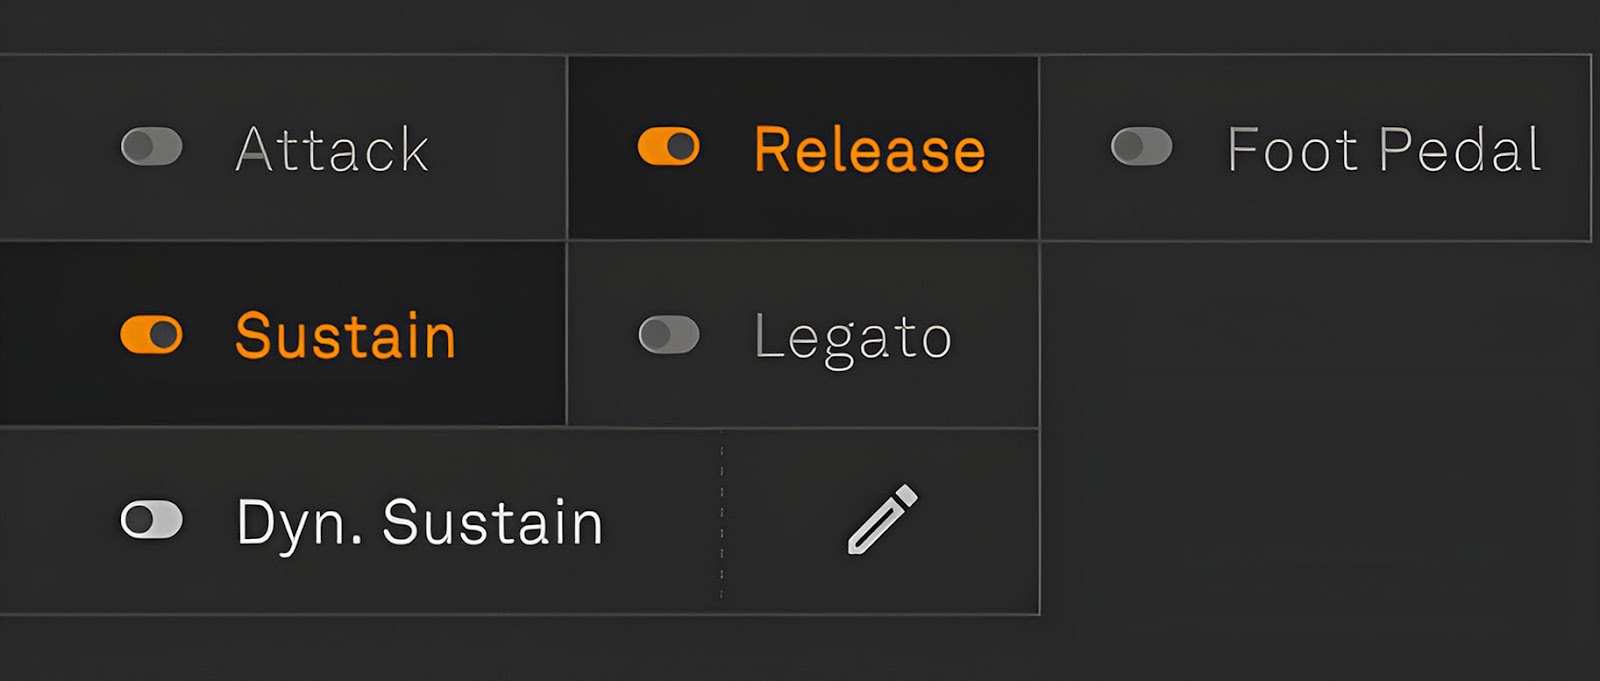
How do I enable or disable Soundpaint effects?
Above the name for each effect, you will see a small button. Clicking this button will enable or disable the corresponding effect.
You can also mass enable/disable by holding alt and clicking the effects tab directly.
Can I use Soundpaint in my DAW?
Soundpaint currently comes in Standalone, VST2, VST3, AAX, and AU formats, which makes it compatible with every DAW!
Will Soundpaint or its libraries ever go on sale?
Soundpaint will never be on sale or subscription. We offer some of the highest fidelity instruments in the world at the most affordable prices, year-round. We want everybody to try Soundpaint, which is why the engine and a few instruments are free. We also want you to own what you purchase, so we do not have a subscription service.
Do I need Kontakt to run Soundpaint?
No! You will never need to use Kontakt or go through Native Instruments to use Soundpaint. Soundpaint instruments run exclusively in the Soundpaint engine. We are its sole creators and the sound engine is free to use.
What are the limitations of Soundpaint?
We actually don’t know yet. The possibilities with it are endless, and we are continuing to add more features. We have yet to max it out, so feel free to try!
What is Soundpaint?
Soundpaint is an entirely new sound engine, with an ever-expanding collection of libraries and the ability to import your own samples. There is nothing else like it on the market. The technology used is essentially AI. It just works. Time does not exist in Soundpaint. Say goodbye to time stretched samples. Say goodbye to artifacts.
I have downloaded my libraries. How do I get them to show up in Soundpaint?
Once you have downloaded your Soundpaint libraries, you will need to add their location to your Soundpaint Directory if they do not appear automatically. Navigate to the options menu in the top left and select “Manage Library & Part Directories.”

From here, select to add a directory.

This will open a files menu, where you will need to select the location the library is stored. Once this location is selected, you will then want to perform a full rescan using the option on the bottom right. Soundpaint will then scan the directory and automatically add all new libraries.

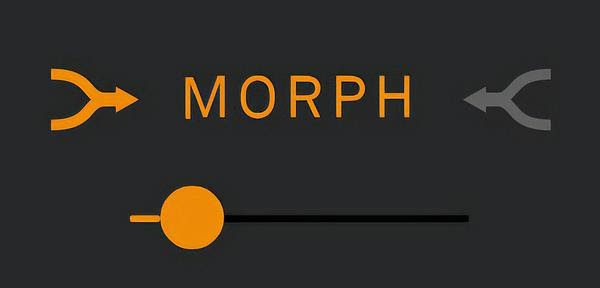
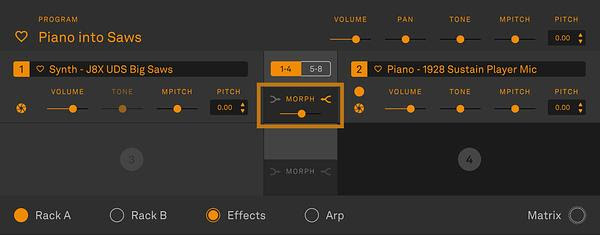
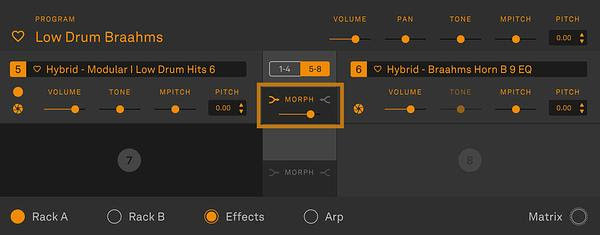
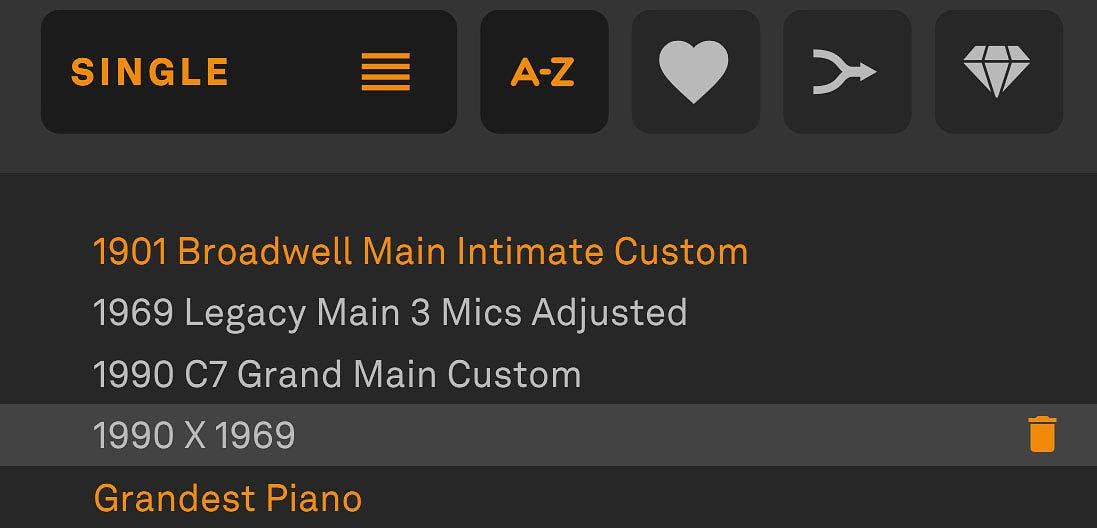
Why are some programs in Soundpaint Orange, and why are the rest White?
Orange programs have the morphing function enabled between parts.
White ones are standard programs that do not have morphing enabled.

Can I reorganize the effect orders?
Yes you can, just drag them left or right into your preferred order. Effects are processed from left to right.


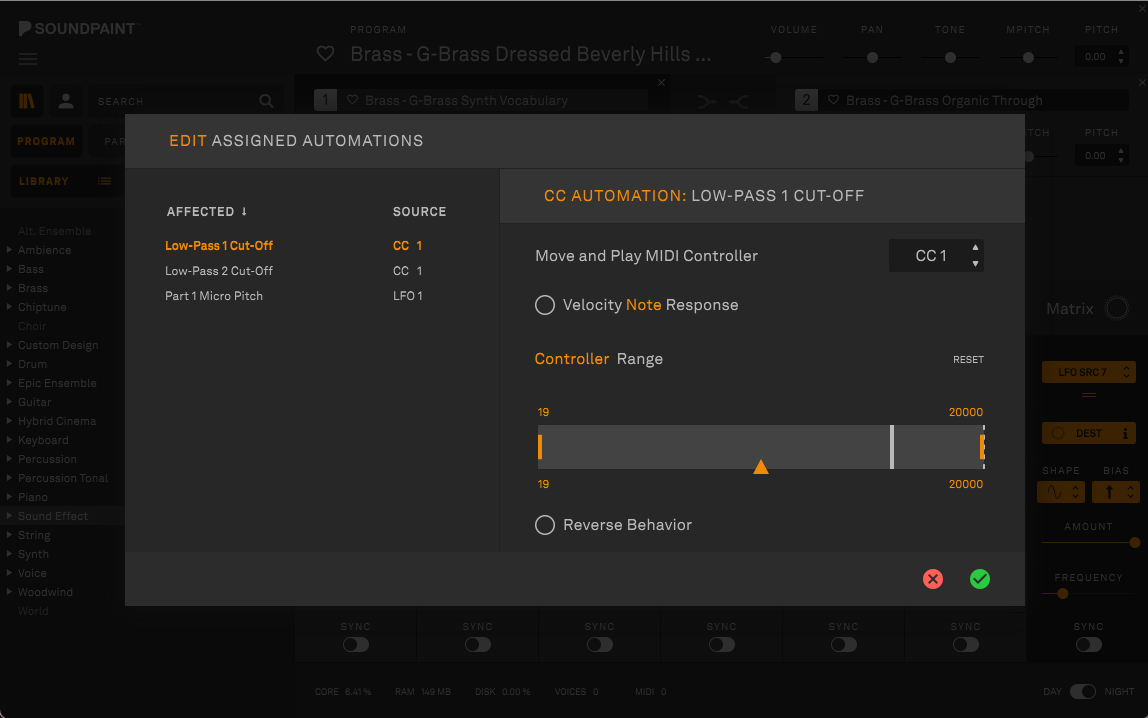


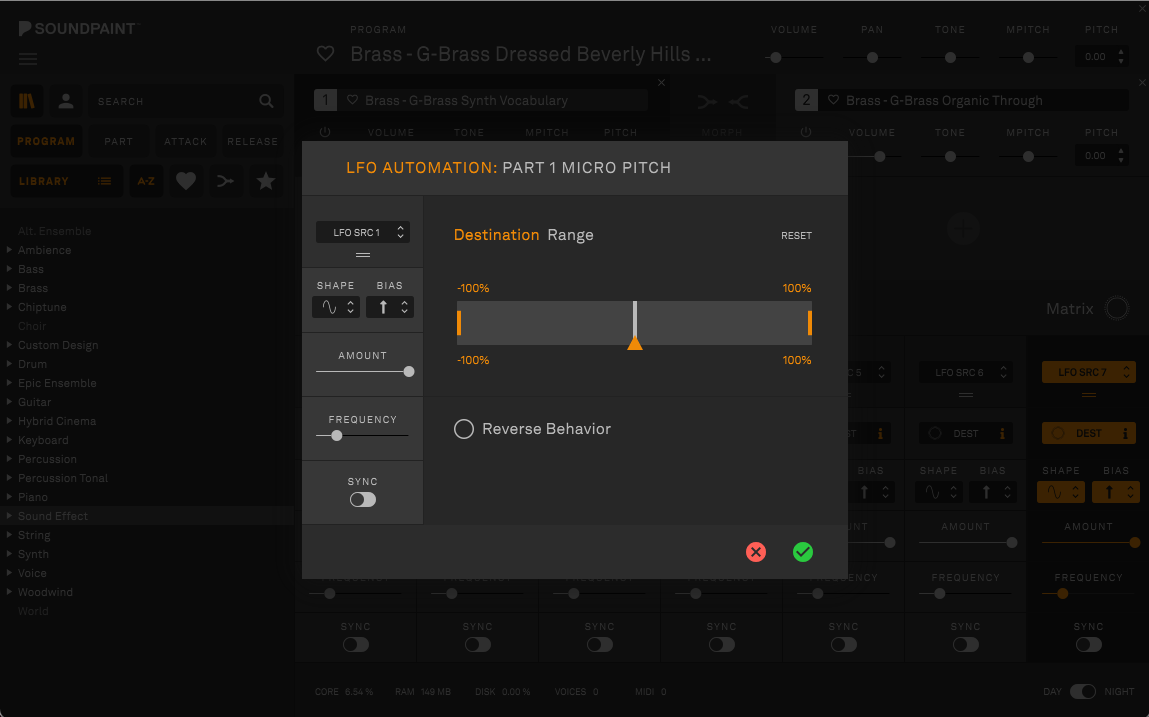
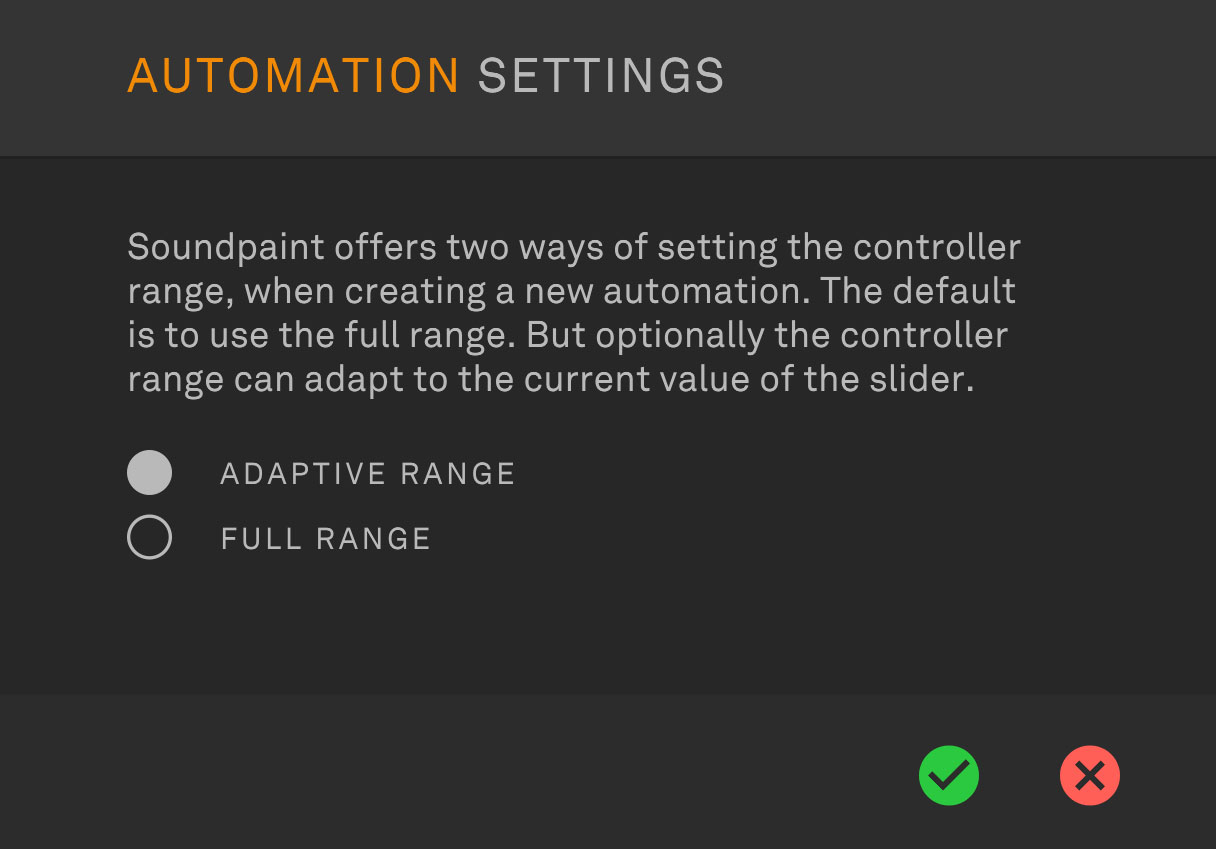
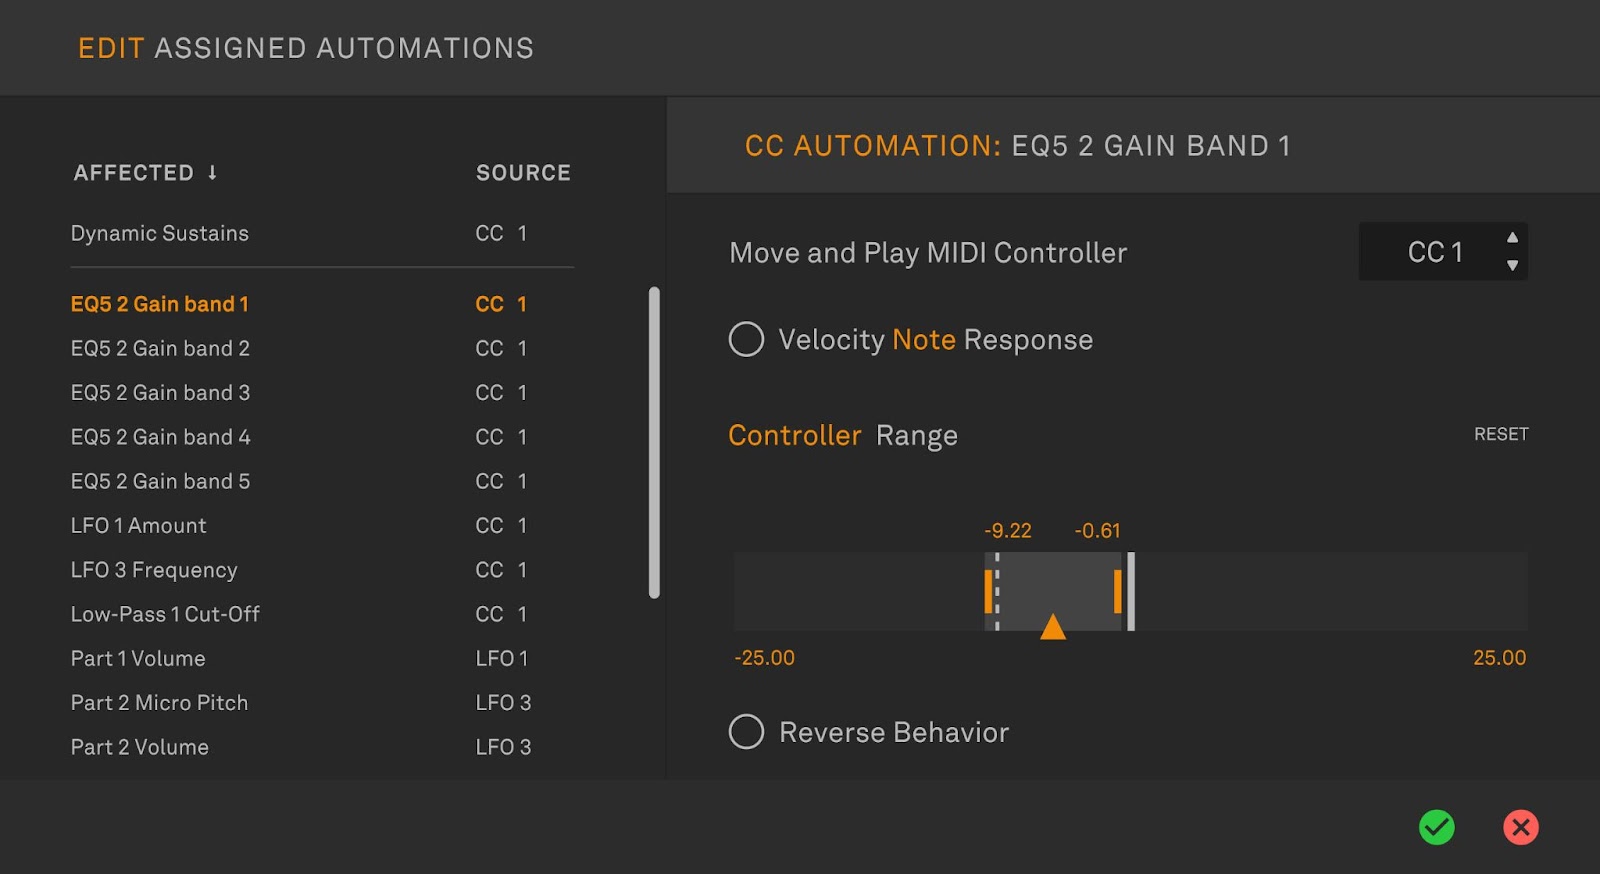
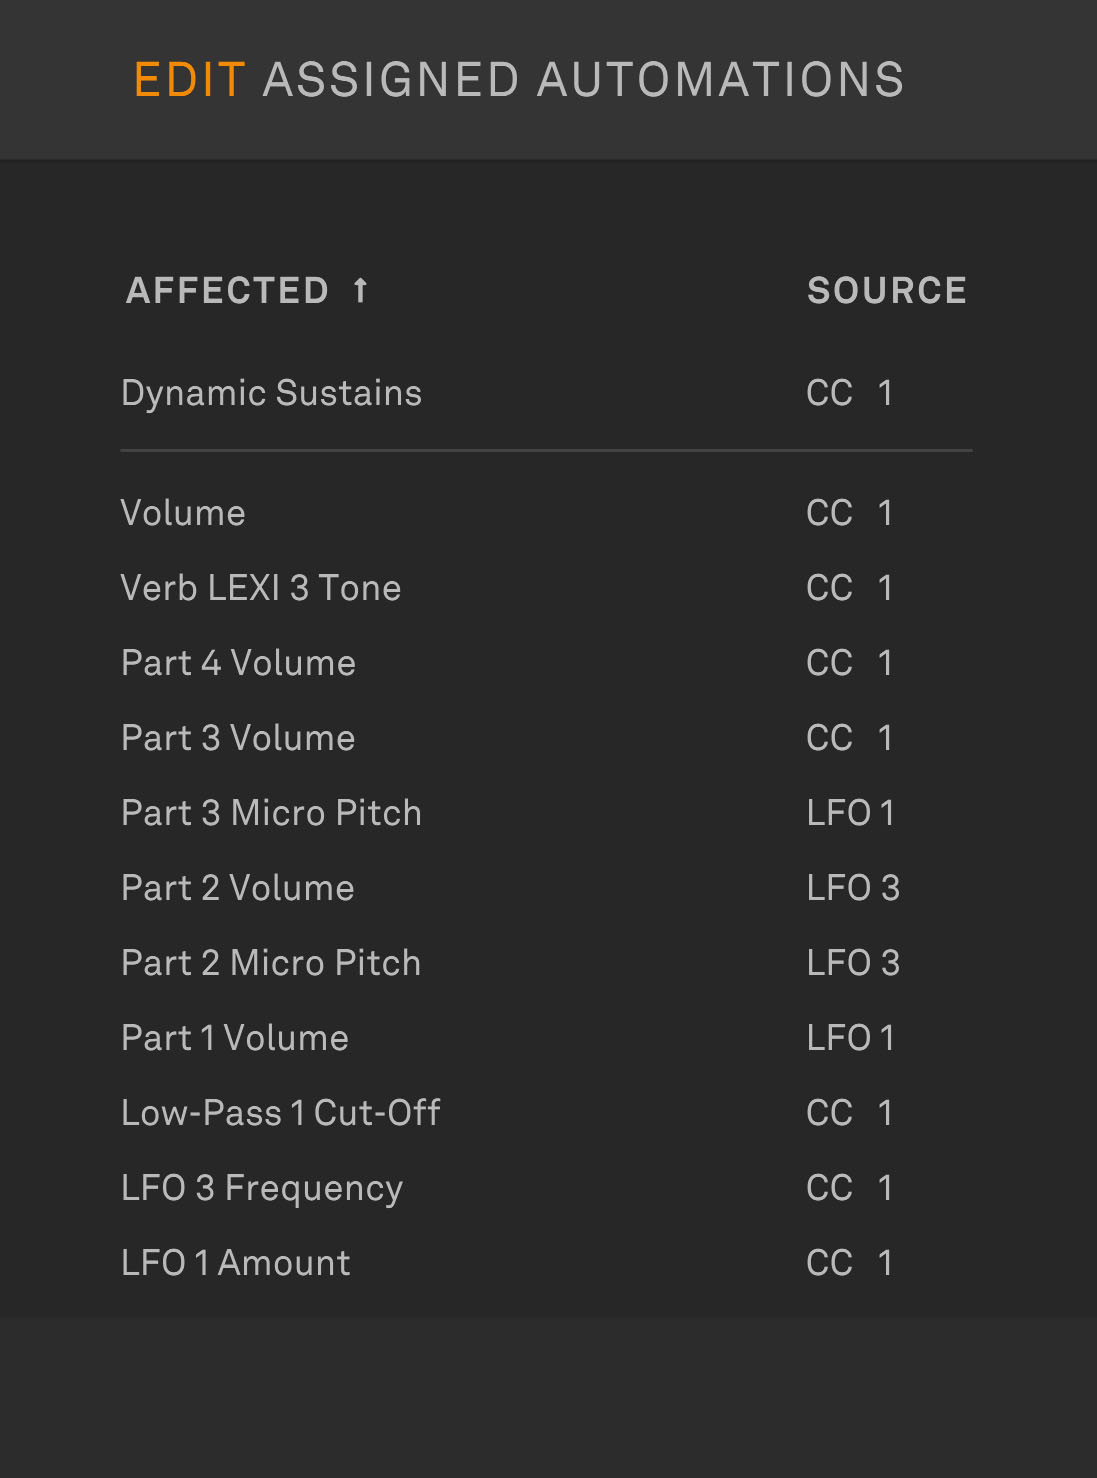
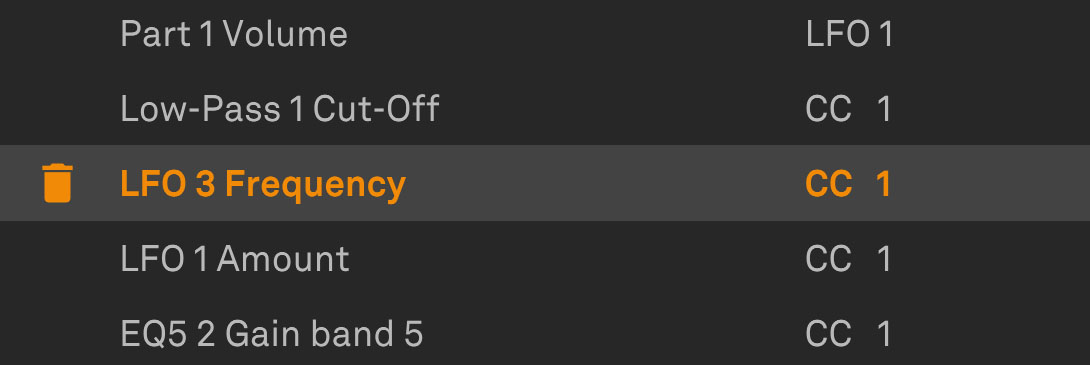
 When you select "Add Host Automation," the parameter will be added to the list of parameters on the instrument track in your DAW. When you select "Add MIDI CC Automation," a window will appear allowing you to select which CC to assign the control to along with some additional options.